Synology DS220+ Setup [Everything That You Should Know]
Given you are reading this blog post; it can mean two things. First, you want to learn how to perform Synology DS220+ setup and second, you are a technical geek who is looking to gain knowledge regarding a new topic. No matter what the purpose of you landing on this post is, we will provide you with all the information that you need to know about Synology DS220+ setup. Taking this into account, you ought to continue reading.
What are the Safety Instructions You Need to Follow?
Just so you do not experience technical issues during the Synology DS220+ setup process, we have given some safety precautions that you ought to follow. They are:

The very first thing that should be done from your end is to locate it away from extreme heat. Along with this, bear in mind that the environment has no abrupt changes in it.

Unplug the power cord right before you clean. Avoid using chemicals or aerosol cleaners and at last, wipe the required area with damp paper towels. This will keep you on the safe edge.

The third thing that you can do is, plug the power cord into the right supply voltage. See to it that the AC voltage which is being supplied is not just correct but also stable.

Make sure that power cords are disconnected from their respective outlets. This is so that, electric current from the device that you are using at the moment gets removed.
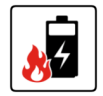
You should know that there is a risk of explosion in case the battery is replaced with a type which is not correct. Therefore, dispose of used batteries appropriately.
Synology DS220+ Setup Process Breakdown
1. Install Drives
To commence with the Synology DS220+ manual setup process, you first need to remove the drive bay cover from the front panel. Once done, push the latch upward. After some time, pull the handle. This is to remove the drive tray from Synology DS220+. Now, you need to load drives in the drive trays carefully.
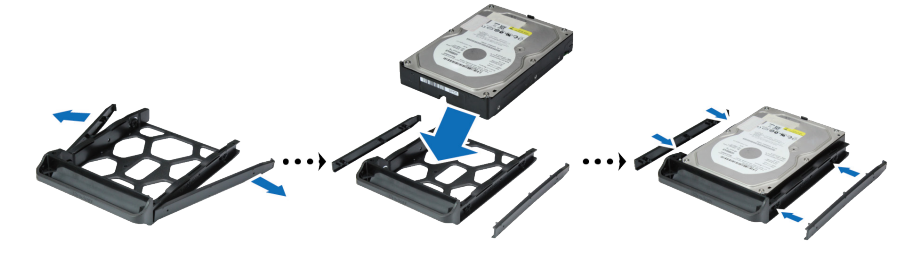
It is recommended that you insert the loaded drive tray into the empty drive bay. You will soon hear a click sound as soon as the tray is locked in its correct place. Now, you may go through the steps that we have just mentioned in case you want to install another drive. In order to complete the partial hardware setup, you need to replace the hard drive cover.
2. Start the Synology DS220
Get your hands on an Ethernet cable. Connect Synology DS220+ to the switch, the WiFi router, or hub using it. Once done, connect one end of the power adapter to the NAS and another to the power outlet. Press the power button in order to turn the NAS on. Now, pat yourself on the back because your Synology DS220+ is now online.
3. Install DSM via Web Assistant
As soon as you are done with the Synology DS220+ setup (hardware), it is recommended that you open an internet browser on your client device and ensure that it is connected to the same network to which Synology DS220+ is connected. Either enter find.synology.com in the address bar or synologynas:5000.
Once the Web Assistant comes into view, it will find Synology DS220+ within the location network. Click CONNECT to go further with the Synology DS220+ setup process and walk through the on-screen instructions. For your information, if you by mistake leave the process before it is completed, sign into the DSM as admin with the password left blank.
What’s More to Know?
As additional information, we have talked about how to perform Synology DS220+ RAM upgrade in this section. Read these instructions to get down to the process:
- Power down the Synology DiskStation DS220+.
- Pull out the hard drive bays.
- Find that the RAM slot.
- Get access to the new RAM and insert the module into the slot.
- Re-insert the hard drive bays.
To know more about this process, you can refer to the product manual. There, you will also find information on Synology Assistant and other related topics.
The Conclusion
If you were careful while reading the information given above, no external factor will be able to stop you from completing Synology DS220+ setup process in a hassle free manner.