How to Optimize Synology NAS to 10GB for Video Editing?
Synology NAS users have increased day by day. Due to this reason, people having various demands with the NAS services have also increased. Recently, a user asked about optimizing the 10GB to Synology NAS for video editing.
Explained: 10GB to Synology NAS for Video Editing
His query went like this: I want to optimize the performance of my Synology device to achieve the desired speeds, which I attained but now struggle to maintain. I have a Synology DS423+ setup with a 10GB card. This connects to a 10GB unmanaged switch featuring two 10GB ports and the remainder at 2.5GB. From there, it links to an OWC Thunderbolt dock boasting a 10GB RJ45 port, which finally connects to my Mac via Thunderbolt.
I’ve configured static IPs for my MacBook and two for the NAS. My objective is to access the internet through the dock’s 1GB connection while establishing a direct 10GB link to the NAS from my laptop via the dock. The primary static IP for the NAS, facilitating DSM manager connectivity, is set at 192.x.x.x, aligning with my router’s gateway. The subnet mask is 255.255.255.0.
To utilize the second static IP for the NAS’s 10GB connection, I’m uncertain of the required settings. Attempts with Automatic Private IP Addressing (APIPA) using a 169 IP address have proven useless. The question is: Do I need to create a static route? As a video editor, my aim is to harness the full potential of 10GB speeds.
Solution: Optimizing Synology NAS for 10GB Speeds
To optimize your setup for 10GB speeds between your Synology NAS and your Mac while maintaining internet connectivity through your dock’s 1GB port, you’ll need to configure your network settings properly. Here’s a step-by-step guide to achieve this:
1. Check Hardware Compatibility
Ensure that all your hardware components, including the Synology NAS, the 10GB card, the unmanaged switch, and the Thunderbolt dock, are compatible with 10GB speeds and properly connected.
2. Assign Static IP Addresses
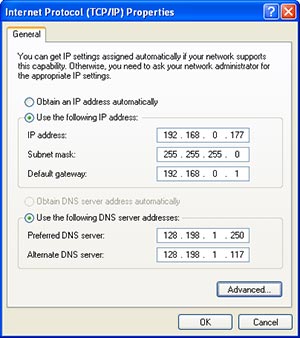
Assign a static IP address to your Macbook that connects to the internet via the dock’s 1GB port. This IP address should be within the range of your router’s subnet. For example, you can set it to something like 192.x.x.100 with a subnet mask of 255.255.255.0 and the default gateway pointing to your router’s IP address.
Assign a separate static IP address to the Synology NAS specifically for the 10GB connection. This IP address should be in the same subnet but different from the one assigned to your Mac. For instance, you can set it to 192.x.x.101 with the same subnet mask.
3. Configure Subnet Mask
Ensure that both devices (Mac and NAS) have the same subnet mask (255.255.255.0) to communicate within the same local network.
4. Configure Default Gateway
The default gateway should be set to your router’s IP address for both the Mac and the NAS. This allows them to access resources outside of the local network, such as the internet. Your MAC and NAS should be connected to the router. This can be ensured by accessing the find.synology URL.
5. Testing
Once configured, test the connections to ensure everything is working as expected. You should be able to access the internet from your Mac and connect to your Synology NAS using both the 1GB and 10GB connections.
The Conclusion
By following these steps, you should be able to achieve the desired setup with your Synology NAS and Mac, enjoying high-speed 10GB connections for data transfer between them while still having internet access through the 1GB port on your Thunderbolt dock.

